
How to Send Emails in WordPress with Gmail SMTP Server
Having issues sending emails from your WordPress website? Well, WordPress uses PHP mail function, by default, which usually fails to work the way it should work due to several reasons. The most popular reason is strict email configurations at your web hosting server. These configurations limit and influence emails delivered from the WordPress website. This is why it is suggested to use SMTP while sending emails in WordPress.
In today’s post, we are going to share what is SMTP, why it is essential and how you can send emails in WordPress with Gmail SMTP Server.
What is SMTP and why you need it?
SMTP is an abbreviation of Simple Mail Transfer Protocol. It is employed when email is sent from one server to another.
As mentioned earlier, a majority of hosting providers restrict the utilization of PHP Mail function to prevent spam and abuse.
Spam filters on various email service providers monitor incoming emails to check if they are dispatched from legitimate mail servers. Default WordPress PHP Mail function fails this monitor and at times might not even make it to the spam folder.
Simple Mail Transfer Protocol is the standard of the industry for delivering emails. It utilizes proper authentication, unlike PHP mail function, which boosts email deliverability.
Gmail offers high quality and reliable SMTP service that can be utilized by WordPress websites to deliver emails. If you are looking to deliver WordPress notification emails to yourself and certain subscribers fo your website, then Gmail SMTP server is an ideal choice.
Nonetheless, if you want to send newsletter emails from your WordPress website, you better switch to mass emailing service providers such as SendGrid or MailGun.
How is SMTP better than PHP Mail function?

For a matter of fact, email spam is an extremely severe problem and businesses worldwide spend hundreds of thousands of dollars to prevent email spam. And PHP mail function is one of the common things that is seriously abused by spammers to deliver thousands of email spam.
However, there is an easy way to prevent spam i.e. by detecting where the email is coming from.
Let’s suppose that your official WordPress admin email address is [email protected] and your website’s domain name is yoursite.com. Emails sent by WordPress will be delivered from an email address like [email protected]. But this is not a real email address.
So several spam filters mark it as spam and thus your email does not even leave your web host before it has been marked as abuse or spam.
There are various WordPress plugins that use admin email address in the reply-to and from addresses of the outgoing email. The email address used will be [email protected]. However, the domain name gmail.com or the admin xyz.official are not the original sources of the email. Thus, it will also be flagged as spam by various spam filters.
Therefore, it is always recommended to use SMTP since it is the common standard used on the web for sending out emails.
How to send emails in WordPress with Gmail SMTP Server?
We are going to share two different ways of connecting to your WordPress site with Gmail SMTP Server.
The first method uses a plugin called WP Mail SMTP while the second method is setting up Gmail SMTP using OAuth Protocol.
First Method: Using Plugin to set up Gmail SMTP server
As mentioned earlier, download and install a WordPress plugin called WP Mail SMTP.
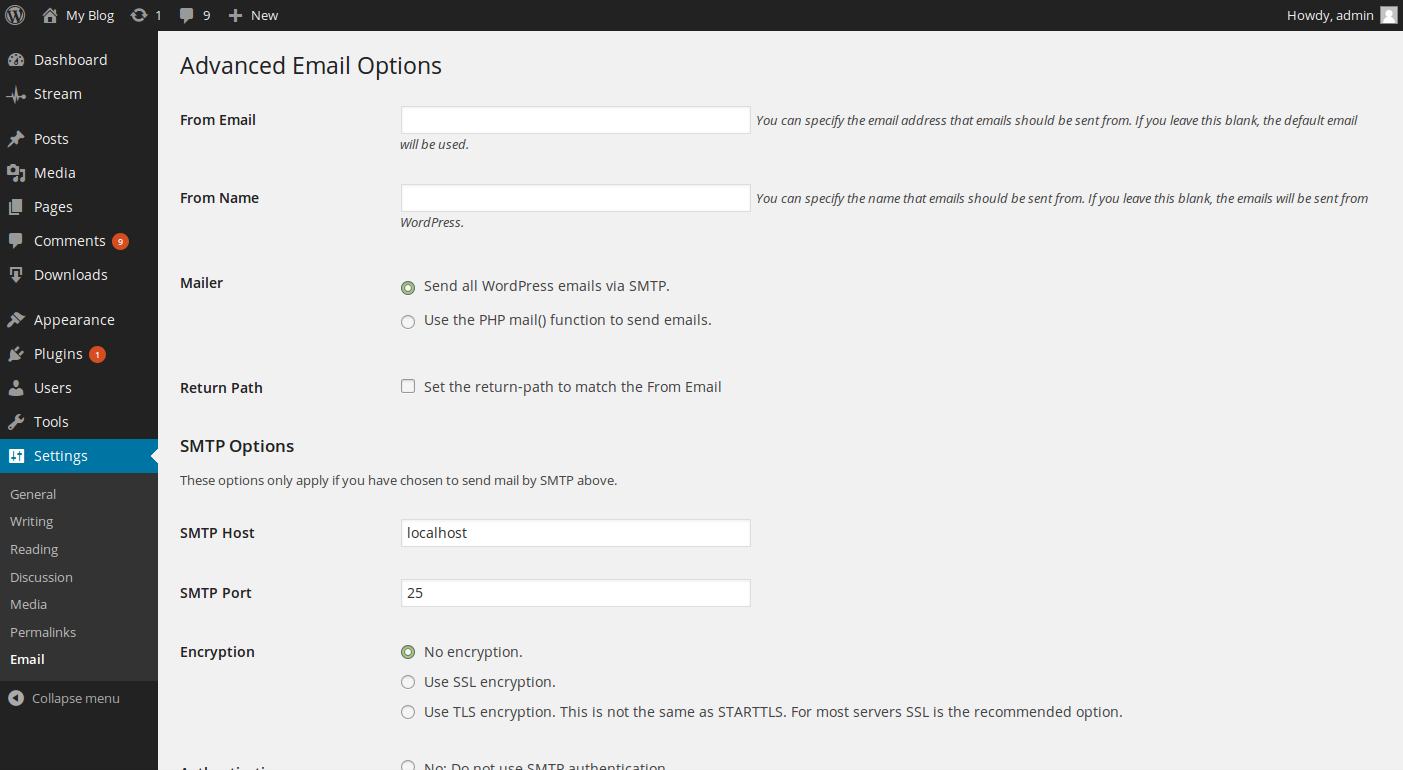
Upon activation, open the plugin’s settings page and configure the following options:
SMTP Host: smtp.gmail.com
SMTP Port: 465
Encryption: Use SSL encryption
Authentication: Yes
Username: Your full Gmail address or Google App email
Password: your account password
Once you have configured all these settings, you would be able to send emails using Gmail SMTP Server.
Second method: Setting up Gmail SMTP using OAuth Protocol
First of all, you would need to download and install Gmail SMTP Plugin in your WordPress website.
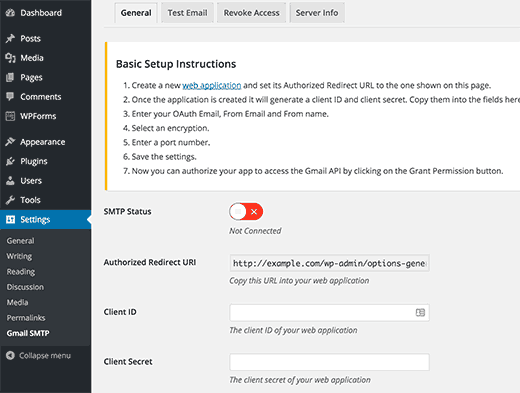
Once you have activated it, open your plugin’s settings to set up plugin settings. While configuring, you will get a notification to create your on a web application with your Gmail account to create API Keys. These API keys are used to verify your website’s use of Gmail SMTP servers.
How to create a web app and create API keys for your Gmail account?
How to create a web app and API keys for your Gmail account?
Step 1: To set up a web application, click on the web application link rendered in the settings of the plugin.
Step 2: The web application link will redirect you to Google Developers Console site, where you would need to log in with your official Gmail account i.e. the one which you will use to send WordPress emails.
Step 3: Upon signing in, create a new project where your application will be registered in the Google Developers Console site, which will automatically enable Gmail API.
Step 4: Click “go to credentials” button to continue
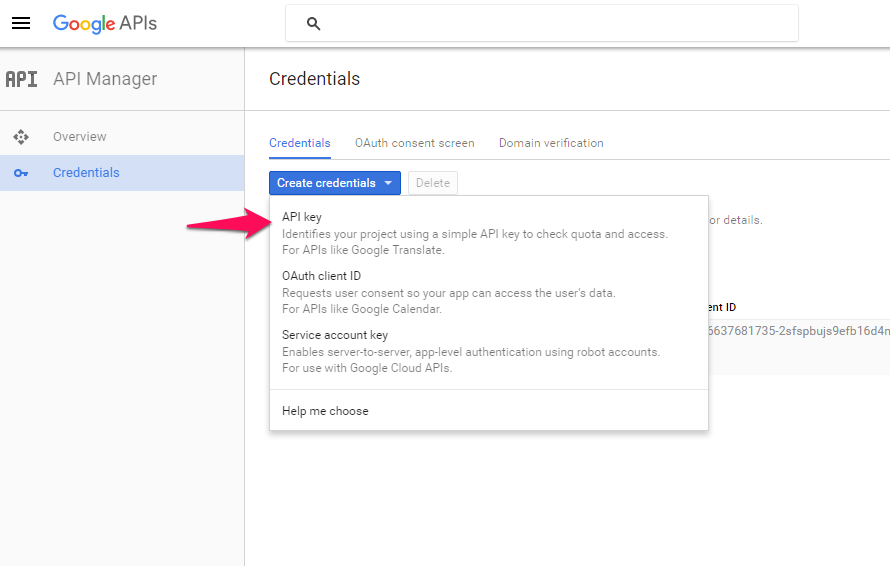
Step 5: Once you have clicked the button, you will be redirected to a new page with an option “Add Credentials to your project”. You will be asked “where will you be calling your API from” select “web browser (JavaScript)” from the drop-down menu. Also, select “user data” for “what data will you be accessing?” and click “what credentials do I need?”.
Step 6: Upon clicking, you will be asked to create the Client ID by entering the URL of the authorized site under “Authorized JavaScript Origins” option and the URL displayed on the plugin’s setting page under “Authorized redirect URIs”. Click “Create Client ID”.
Step 7: Now it’s time to setup the OAuth 2.0 consent screen. Enter the official email address and the project name shown to users. Click continue.
Step 8: Under “download credentials”, you’ll be given the Client ID. You can either copy or download the information in JSON format, although it will always be available for you on the credentials page. Hit done to complete the process.
Step 9: Now you will be able to see the client Ids list that you have built to use your Gmail API. Open by clicking on the project client. You will be redirected to a new page where you will see the client ID, Client Secret, and Creation Date.
Step 10: Simply copy Client ID and Client Secret and paste them in your plugin’s settings page in the similar textboxes.
Step 11: Now configure the rest of the plugin settings. You will require to put your official Gmail address in your OAuth email address as well as “from email address fields”. You can use your website name or your name in the ‘from name’ field. Also, encrypt all the emails by selecting TLS and 587 as a port. Finally, hit save changes.
Step 12: Refresh the plugin’s settings page and hit the “Grant Permission” button on the bottom of the page. You will be redirected to Google Accounts where you will need to give your site permission to access your Gmail account. Move back to your WordPress dashboard, you will notice your SMTP Status Icon turned into green.
Congratulations, you have finally configured your Gmail account and SMTP server to send emails from your WordPress website.